Monday, July 11, 2011

Crafting With Friends


This past Saturday myself and Donna put on another crop, we call ourselves "Creative Cuts".  Donna came up with the catchy name last year.  One of my biggest dilemmas when attending a crop is what to bring.  I never have gotten this down to a science, I always bring too much.  Some stuff I end up never opening the bag, you would think I would learn.

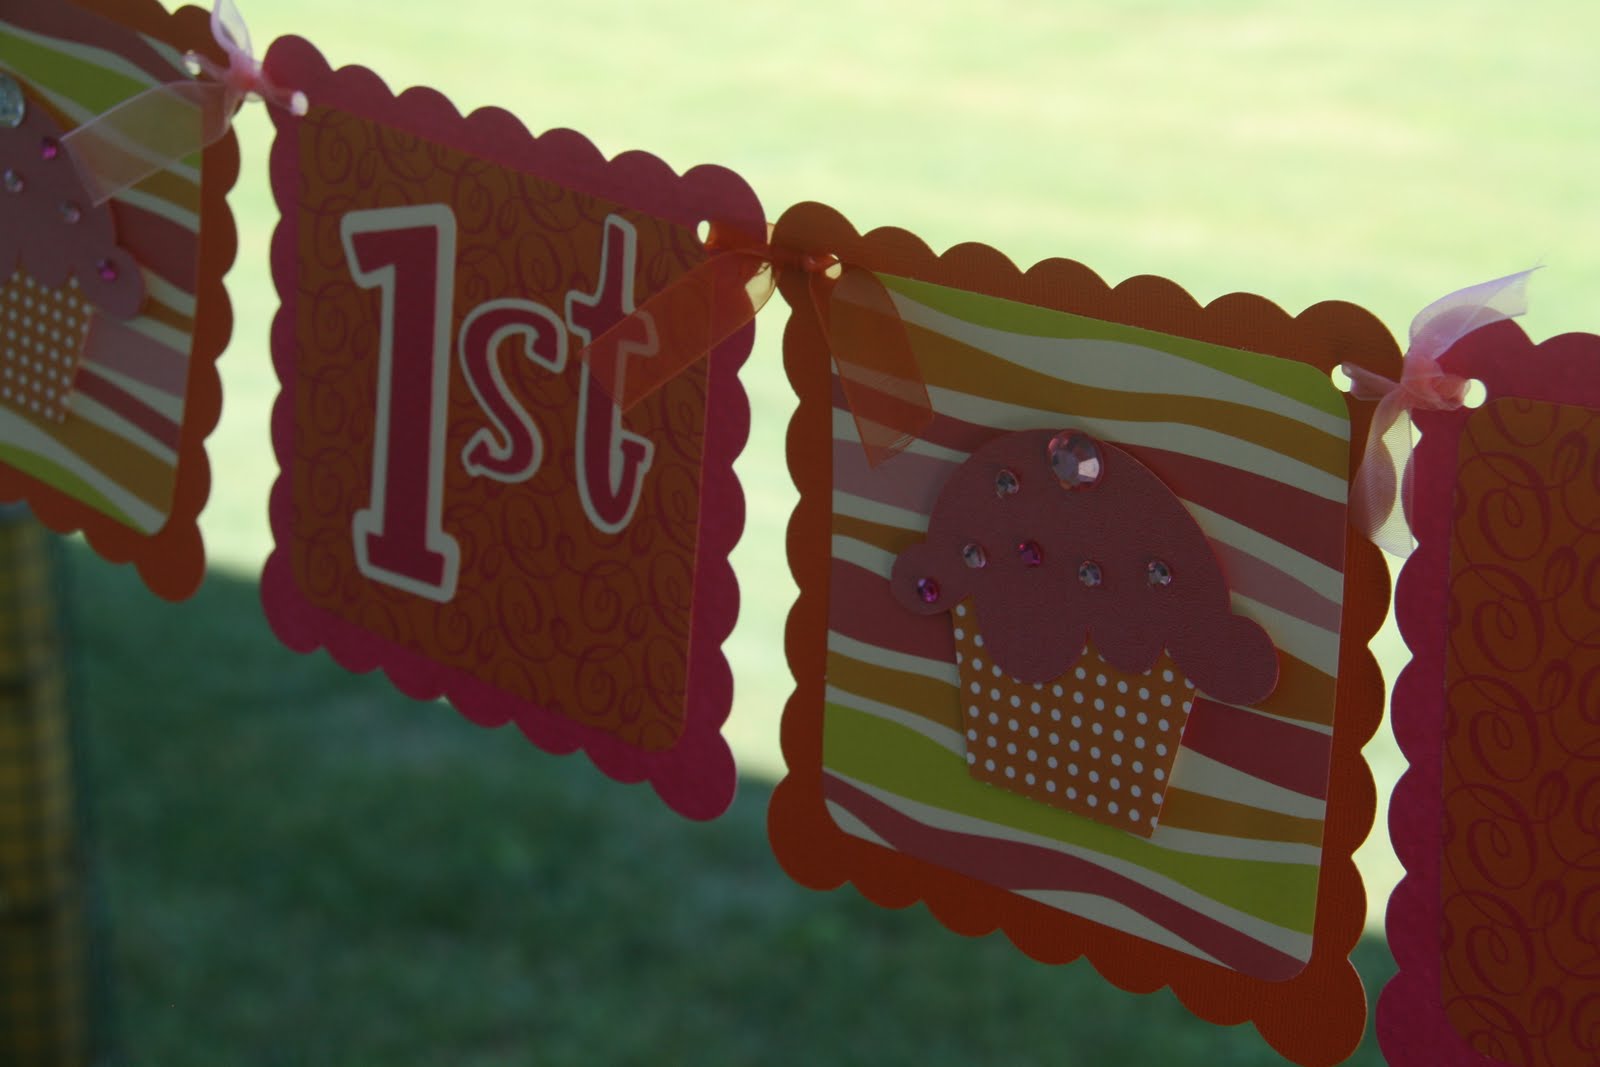
I aim to have a plan, this time around I knew I would be working on a banner for Donna's daughters first birthday.  She had picked out some great pink and orange paper she wanted to use.  Between the set up and just greeting everyone I don't think I actually sat down at my seat until 11:30, meanwhile I was there since 8:30 to get ready but that is a whole other story.

I asked Donna lots of questions about what her expectations were because well after all this was for a special occasion.  She wanted the borders to be scalloped, I love that too.  I had a little panic at first though because I couldn't find the scalloped square on the Cricut, shout-out to Heidi for locating it and making me feel better.  Phew.

Once everything was cut out, assembly began.  One of the final decisions was to bling or not to bling.  Bling it was and I am so happy with how it came out.


Monday, July 4, 2011

Happy 4th of July Cake


I originally saw this cake over at Crafty Mama, I love the look of it but did not love the recipe.  I am all for baking from scratch, but I really felt a cake mix would do in this case.  This cake was more about the look for me at least.

I used two cake mixes for all the layers.  In each of the two 8 inch cake pans I would pour 1 cup of cake batter in, and bake them two at a time as all I own is two 8 inch pans.  The layers still came out a little thicker than I had planned.


The blue layer was made with 2 cups of batter as it had to be the thickness of 2 red layers.  If you follow the directions from Crafty Mama, you will cut a circle out of a piece of parchment or wax paper for the top layer.  Well I guess you can say I cheated, or made this step a little easier.  I used a large biscuit cutter to cut the center out of the blue layer, and then cut the center of a red layer to fill in the blue layer.  Okay did I confuse you yet?

Well the cake was a really tall layer cake and I really didn't think it would survive the icing part, it tilted from side to side and I did panic a little bit.  The cake at least made it to the table and I was able to cut a few slices before it took a mysterious nose dive off the plate when I turned my back.

Wednesday, June 22, 2011

Horse Theme Birthday Banner


I had a friend from the mom's group inquire about making a banner for her son's birthday party.  She was very specific on the paper she wanted and sent me the link.  They were using  Debbie Mumm paper to make the invitations and it really was cute.


I found the paper in Michael's and bought all they had, as I didn't want to take any chance or running out mid-project and not be able to get more.  That could be disastrous.


While in Michael's I saw these cute die-cut horse stickers and knew they were a must have for the spacers.


This banner did consist of a second strand for the name.  Adding a name continuously to an already 8 foot banner can be too much, plus it gives them more options when they go to hang it for the party.


Wednesday, June 15, 2011

Fabric Wreath


I had been thinking since I took the Christmas wreath down some time ago, that I really wanted something on the front door.  I wanted a wreath but what kind I was unsure of until I saw this on another blog.  So off to the craft store I went for the supplies.  


I needed fabric, that was number one.  I wanted something summery and festive.  My original plan was to go with red, white and blue, but that didn't pan out when I couldn't find those colors in Walmart's fabric section.  So I went with some summery Caribbean sea colors.  I bought the fabric in a bundle, and bought two to be on the safe side of having enough to cover a wreath form.  The directions called for a 12 inch form, but of course when I got to the store I couldn't remember reading a size anywhere and ended up buying a 18 inch form.  Good thing I got that extra fabric.


The fabric got cut into 1 inch wide by 6 inch long pieces.  My cuts were rough, I just eyeballed them.  From there you just tied them to the form, I double knotted them to keep them from falling off.  It took about 2 hours from start to finish, cutting and tying.  I was pretty pleased with the look of it when all was said and done.


Saturday, June 11, 2011

Peanut Butter Oatmeal Cookies


At some time yesterday I read on Facebook that it was National Peanut Butter Cookie Day on June 12th.  I love peanut butter cookies, so this was just an excuse for me to fire up the oven and bake a batch.  One of my favorite peanut butter cookie recipes comes from America's Test Kitchen, but I saw that Peanut Butter & Company was selling Peanut Butter Oatmeal Cookies for the "holiday".  I love peanut butter, and I love oatmeal so I went in search of a recipe.


It didn't take long for me to find a keeper.  Allrecipes had one that had straight forward ingredients and the reviews were glowing.  I did however swap out the shortening and used butter.  I didn't have any shortening on hand, and I just usually prefer butter.  I have been known to have 20 pounds of butter in the freezer just in case of a baking frenzy.  I also didn't flatten with fork, they did fine on their own.

The result was a delicious cookie.  Could be adding this recipe to my make for Christmas present list.


Ingredients

  • 1 1/2 cups shortening
  • 1 1/2 cups peanut butter
  • 2 cups packed brown sugar
  • 3 eggs
  • 2 teaspoons vanilla extract
  • 3 cups quick cooking oats
  • 2 cups whole wheat flour
  • 2 teaspoons baking soda
  • 1 teaspoon salt

Directions

  1. Preheat oven to 350 degrees F (180 degrees C).
  2. In a mixing bowl, cream the shortening and peanut butter. Add the brown sugar, eggs, and vanilla; mix well.
  3. Combine oats, flour, baking soda, and salt; add to the creamed mixture and mix well.
  4. Drop by the rounded teaspoonfuls onto ungreased baking sheet. Flatten with fork. Bake for 12 minutes or until done.

Tuesday, June 7, 2011

Kiss of Death

I often worry about jinxing a good thing.  For example saying at work "Wow it's quiet tonight", driving in the car and saying "Easy ride, no traffic".  These statements could be the kiss of death, five minutes later things can be going haywire at work or I could hit the Cross Bronx Expressway and crawl the rest of the way to work.

This year I worried about jinxing the flowers in the garden, I could be doing it right now by just writing about them.  But since we moved into the house there were flowers that I had planted that I didn't even know the color of, as the deer tend to shear off all the buds before I even get to see any color.  This year all of the plants, so far, have bloomed and blossomed.


These are the day lilies I had never seen the color of.


The irises get bigger and more beautiful every year.


The hosta have filled out.


I bought two of these potted tomato plants at Costco this past Friday.  I have tried the past three years to grow some vegetable only to have the deer trash my plants and smash my tomatoes.  In each of the pots is a very well established tomato plant, basil and marigolds.  

As much as I despise the deer sometimes, I really do think they are beautiful animals.  Just tonight on the way home from the movies we saw a mother and brand new fawn crossing the street.  The do hold a sweet spot in my heart.


Monday, June 6, 2011

Enchilada Casserole


Through the mom's group I belong to we have a meal support to help mom's who maybe just had a baby or  if they are sick.  I try to make something that travels and reheats well.  This past week I had a meal support and I knew exactly what I was going to make.  The family I was cooking for was keeping an eye on what they were eating so I didn't use ground beef, I used ground chicken.

The Enchilada Casserole is full of flavor and one recipe makes enough for two families, so I kill two birds with one stone feeding both families.  Normally it gets made in a 9X13 baking pan, but I arrange the ingredients in two 8X8 baking pans.  The recipe says it serves 8-10, but those serving sizes would be big pieces, I am going to say it serves 12 generously.

Now some of you may look at this recipe and think there are a lot of steps, don't skip any of them because everything is done for a reason.  The toasting of the corn tortillas give the casserole a rich corn flavor, the homemade enchilada sauce is delicious.  This isn't your typical greasy mexican casserole.  I actually love it with Texas Caviar as a side.

Enchilada Casserole
From Cooks Country Magazine


20(6-inch) corn tortillas 
1 1/2cups  low-sodium beef broth 
1(10-ounce) can Ro-Tel tomatoes (see note)
2pounds  85 percent lean ground beef 
2tablespoons  vegetable oil 
2onions , chopped fine
8garlic cloves , minced
2tablespoons  chili powder 
1teaspoon  ground cumin 
3(15-ounce) cans tomato sauce 
4cups  shredded colby-Jack cheese  (see note)
3jalapeño chiles , seeded and minced
1tablespoon  hot sauce 
Salt and pepper 


1. TOAST TORTILLAS Adjust oven rack to middle position and heat oven to 450 degrees. Grease 13- by 9-inch baking dish. Toast 3 tortillas in large nonstick skillet over medium-high heat until they bubble and turn spotty brown, 1 to 2 minutes per side. Transfer to plate and repeat with remaining tortillas.
2. PROCESS TORTILLAS Tear 8 toasted tortillas into rough pieces and transfer to food processor. Add ¾ cup broth and Ro-Tel tomatoes (with juice) and process until smooth; transfer to large bowl. Add beef to empty skillet and cook over medium-high heat until no longer pink, about 5 minutes. Drain beef in colander, then transfer to bowl with tortilla mixture.
3. MAKE FILLING Add oil and onion to empty skillet and cook until softened, about 5 minutes. Stir in garlic, chili powder, and cumin and cook until fragrant, about 30 seconds. Add tomato sauce and remaining broth to skillet and simmer until slightly thickened, 
5 to 7 minutes. Stir half of tomato sauce mixture, 1½ cups cheese, 1 minced jalapeño, cilantro, and hot sauce into bowl with tortilla mixture. Season with salt and pepper.
4. ASSEMBLE AND BAKE Arrange 6 toasted tortillas in bottom of baking dish. Spread filling evenly over tortillas. Arrange remaining tortillas over filling and top with remaining tomato sauce mixture. Bake until filling is bubbling around edges, about 30 minutes. Sprinkle remaining cheese and remaining minced jalapeño evenly over casserole. Bake until cheese is browned, 15 to 20 minutes. Let cool 20 minutes. Serve.